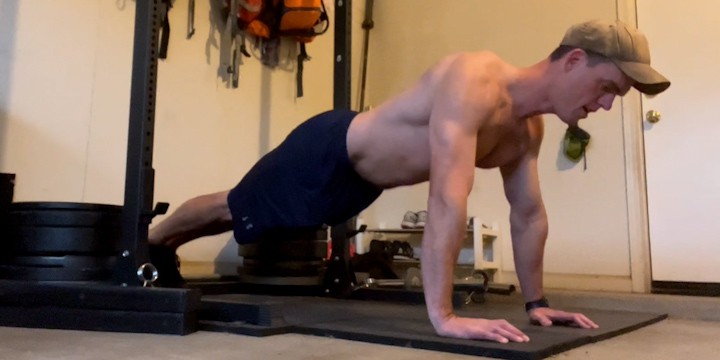
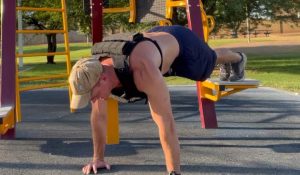
Push-ups are a staple upper body strength exercise. If you’re lucky, you learned them as a youngster. Many folks move on from push-ups in favor of sexier exercises … but what many of them don’t know is that they don’t need to. A couple of very simple cues would make push-ups harder and significantly more effective.
Before we get too into the weeds:
The technique cues to make push-ups harder are:
- Narrow your grip
- Slow down the eccentric
- Pause briefly at the bottom
- Explode back to the top
- Lock out and Squeeze at the top
Push-ups can further be made tougher by adding weight, using a resistance band, elevating the hands, or elevating the feet.
If you’re one of those individuals who has written off the push-up because you believe they’re too easy, take a few notes from this article.
Before we get too into the technique cues, a couple of pointers:
Stop focusing on REPS
Note that if you’re trying to increase your rep counts for some type of job-related test (or simply because you want to), then this article isn’t for you.
In this article, we’re discussing how to get better muscle-building benefits from our push-ups. We don’t care how many repetitions we can do in a single set. We care about:
- Getting a great contraction in the muscle
- Approaching failure with each work set (2-3 RIR)
- Achieving an optimal volume of sets per week (10-20)
We won’t be using any circus tricks here like extended isometrics or calisthenic “skills” like planche push-ups. We’ll be simply using common sense and basic physics to make push-ups work for us.
Technique cues: how to make push-ups harder by doing them “properly”

Honestly, I cringe a little when I hear someone mention doing an exercise “properly,” because the statement often lacks context. In this context, when I say “properly”, I mean, utilizing basic technique cues to get the most out of each repetition.
All of the tips below are simple technique cues.
1. Narrow your grip
If you’re going for a PR on the Murph Challenge, then widening your grip to make the reps easier makes a lot of sense (looking at you, Hunter McIntyre). But if we’re trying to maximize the hypertrophic benefits of push-ups, then it’s simply the wrong approach.
Narrow your grip! Shoulder width should do it. This will have the dual effect of increasing the range of motion on the push-up, but it will also help bias the pesky “upper” chest in your push-ups (by creating a 45-degree angle between the humerus and trunk) while simultaneously placing more stress on the triceps.
You’re welcome to narrow the grip even further, but then you’re getting into diamond push-up territory. While there’s nothing wrong with diamond push-ups, I find that a simple shoulder-width grip is sufficient for stressing the target muscles effectively.
2. Slow down the eccentric
While I said earlier we wouldn’t be doing any circus tricks like glorified isometric holds, etc., I do believe the slowing down the rep, just a bit, is extremely helpful. A two to three second eccentric on almost any exercise will yield better hypertrophic results simply because we’re keeping stress on the target muscle by controlling the movement rather than just allowing the weight to drop.
This is as true on a bench press as it is on a push-up, by the way. In your mind, count to two-one-thousand on the way down. Your chest should by lightly touching the ground by the time you finish your count.
A subtle difference, but you’d be amazed at how many fewer repetitions you get just by making this adjustment.
3. Pause at the bottom
Another no-brainer is to add a short pause at the bottom. This removes much of the “stretch reflex” from the muscle which helps us on the way up. Remember, we’re trying to make the exercise harder.
When you pause at the bottom for even a short count of one-one-thousand, you’ll find that the concentric (raising) portion of the exercise is significantly tougher.
The reason for this is simple. You’re having to overcome your actual bodyweight, rather than relying on the elasticity of your muscles.
4. EXPLODE back to the start position
On the way back to the top of your push-up, you’ll want to do the exact opposite of what we’ve been doing so far by slowing down the repetition.
EXPLODE back to the top. Imagine accelerating all the way to the top. In practice, this may or may not look like your body is moving “quickly” (especially if you’re doing a weighted push-up).
However, moving with the intention of raising your body as fast as possible will aid in fatiguing the targeted muscles, decrease your overall rep count, and make the exercise more hypertrophic overall.
5. Actually lock out at the top
It doesn’t matter what exercise you’re doing: if the goal is hypertrophy, use a full range of motion. A simple YouTube search for “push-ups” reveals video after video of folks pumping reps without locking out at the top. That’s fine if you’re trying to pump up your numbers, but terrible if you’re trying to build muscle!
Seriously, lock out at the top! I use two technique cues for the push-up lockout:
- At the top, act as though you’re trying to “reach” with your upper back to touch the ceiling.
- At the top, act as though you’re trying to “press” the biceps together.
Both of these technique cues will create an insane contraction in the pectorals, especially if you’re also using a narrow (shoulder-width or less) grip width. Your pecs may even cramp up after a few repetitions if you haven’t done this before.
Make push-ups more effective by using basic equipment

Though I firmly believe that most people could simply benefit from using the tips above for quite some time before they truly “need” do add equipment, harder push-up variations are easy to achieve once the technique cues described above stop providing a desired stimulus.
Add weight
I’ve not been shy about my love of weighted push-ups. They are perfectly capable of becoming a primary compound pressing exercise. Used in combination with weighted dips, they are perfectly capable of fitting into a “DUP” style of weighted calisthenics program.
More importantly for you, they will make push-ups significantly harder. I recommend starting with around 10% of your bodyweight in plates or a weighted vest and adjusting from there.
Add a resistance band
Though you could technically mix this tip with the one above (adding weight), I would personally recommend picking one or the other. You’d be surprised how different push-ups are with even a light (red) band placed around the back.
Resistance bands have a different strength curve than a normal weighted push-up, making the exercise tougher as you rise to the top. Though the weighted push-up is likely better for hypertrophy because it emphasizes the stretched portion of the exercise, the resistance band push-up allows for a great contraction of the pectorals and triceps at the top, leading to a great pump.
One of the main benefits here, however, is simply the fact that you can bring a resistance band with you literally anywhere, whereas you can’t necessarily pack a 50lb weighted vest into a carry-on when you take a flight. Adding a resistance band is, therefore, my preferred method for when I travel.
Elevate the hands
Another potential no-brainer here, but elevating the hands will increase the range of motion in the part of the rep that matters, the stretched portion.
There are numerous ways to do it:
- Push-up handles are cheap and available for purchase at basically any big-box store
- Weight plates can be stacked to elevate the hands (if you’re in a gym)
- If no equipment is preferred, you can always perform push-ups on your knuckles to increase the range of motion.
Increasing the range of motion will have a direct effect on hypertrophy and make the push-up harder.
Elevate your feet
It’s amazing how elevating your feet has an effect similar to adding a 25lb plate on your back. Not exactly the same, but similar. Placing the feet on a bench or chair, in combination with the technique cues mentioned above, will directly make your push-ups tougher and therefore more effective for muscle building.
Putting it all together: the ultimate push-up for muscle growth
Now that you’re privy to the many ways to turn the push-up into an upper-body resistance training powerhouse, try putting it all together.
Wherever you are, get down on the floor and do some push-ups! Make sure to:
- Use a shoulder-width grip
- Count to two-one-thousand on the way down
- PAUSE for a one-count at the bottom, with your chest lightly touching the ground
- EXPLODE back to the top as quickly as possible
- At the top, imagine trying to touch the ceiling with your upper back, and press your biceps together
- Repeat
Apply those technique cues to ALL the push-up variations you do, whether weighted, feet-elevated, with a resistance band, or regular push-ups with bodyweight.
I guarantee you won’t be doing 80-100 repetitions in a row when you’re utilizing all of these tips together. Utilize best practices for muscle building (10-20 total weekly sets, 2-3 times a week, near failure) and you’ll be on your way to gains in no time.
Now, get those push-ups into a proper program:
Happy pressing!


