They say that necessity is the mother of invention, and I’ve noticed that the times in my life when I’ve had the least access to gym equipment or been the most time constrained have led to some of the most interesting discoveries when it comes to fitness and strength. Enter the Jefferson Deadlift.
The Jefferson Deadlift is a highly effective compound lift that is known for it’s ability to build muscle in the legs and core as well as its carryover to sports performance. The Jefferson deadlift will build the quads, hamstrings, glutes, erectors, and the often-neglected obliques. It can be done as a standalone exercise or used in combination with other exercises in barbell circuits, since it requires minimal equipment and can be done from the floor.
In this article, we’ll discuss the proper form and technique for the Jefferson deadlift, as well as provide tips for incorporating it into your workout routine.
What is the Jefferson Deadlift?
The Jefferson deadlift, also known as the “Jefferson Lift”, was originally invented by strongman Charles Jefferson. The exercise involves lifting a barbell from the floor whilst straddling the bar (one foot in front and the other behind).
The asymmetrical nature of this old-school lift makes it odd-looking, but those who try it are often surprised by the training stimulus it provides.
The Jefferson Deadlift is particularly useful for athletes who need to build strength in an asymmetrical stance, or build rotational power, since the core muscles work hard in this exercise to keep the weight from rotating.
However, one of the main features of this lift is that it involves quite a bit more quadriceps activity than traditional deadlift variations, making it very useful for those who are seeking to build their quads with nothing but a barbell and no rack.
How to perform the Jefferson deadlift
- Set up a bar as you traditionally would for a normal deadlift – use either iron plates on a deadlift platform, or use bumper plates on any other surface.
- Set one foot in front of the bar, toes facing forward (similar to a behind the back deadlift position). Place the other foot behind the bar, toes parallel to the bar. The feet should be about shoulder width apart.
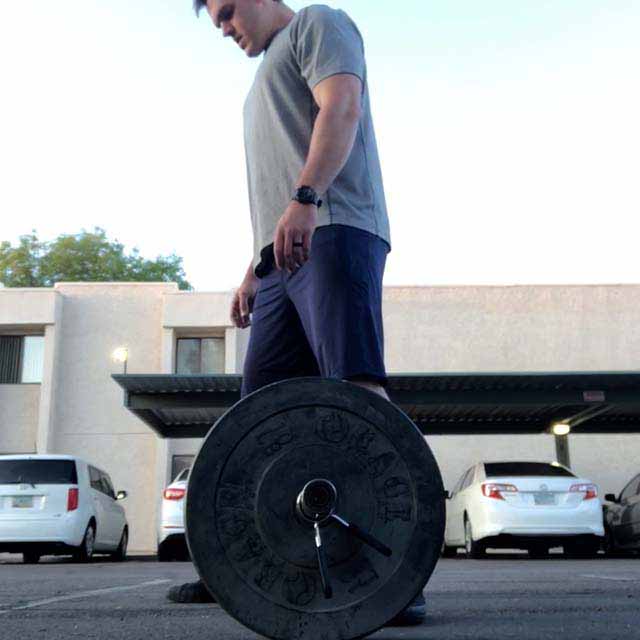
- Reach down and grasp the bar, one hand on either side of the forward foot. Any grip is permissible here – many may find that a mixed grip works well due to the asymmetrical stance.

- Brace as you would for a normal deadlift, set your back as you would in a normal deadlift, and lift the bar between your legs.

- Once completed, reverse the lift to lower the bar. This exercise can be done “touch-and-go” style (tapping the weight on the ground between reps), or like a conventional deadlift where the lifter is setting the weight down and resetting their position between reps.
Quick tips for doing the Jefferson deadlift
- You’ll want to have basic proficiency on the deadlift prior to attempting this lift. Skills such as setting a straight back, packing the shoulders, and bracing should all be second nature to you as you perform your first few sets of the Jefferson Deadlift.
- As this is an asymmetrical lift, make sure to switch legs between sets, and do an even number of sets to account for the variations in muscle activations between sides in each set.
- Pro tip: Warm up with lighter weights as you would in a normal barbell deadlift or squat session. This will allow you to gauge your hand placement, determine optimal bar velocity, and avoid smacking your nether-regions with the barbell on the way up (feel free to ask how I figured this one out).
Jefferson deadlift muscles worked
The muscles worked in the Jefferson deadlift include all the usual suspects where deadlifts are concerned: hamstrings, glutes, erectors, lats, traps, core, etc.
However, one of the main Jefferson deadlift benefits is that the exercise stresses the quadriceps and obliques to a much higher degree than other types of deadlifts:
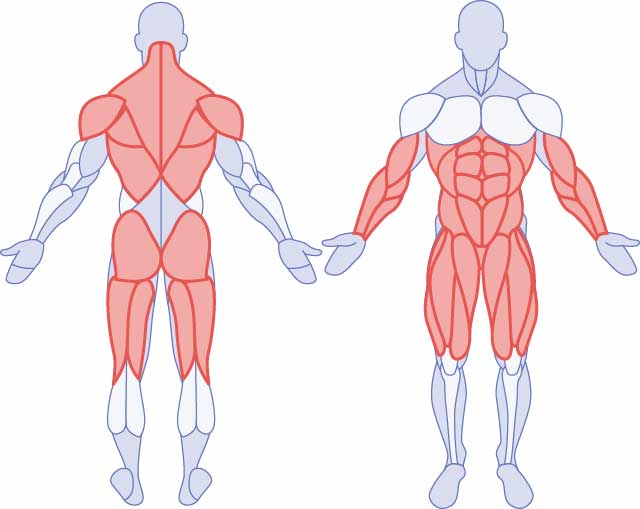
This can be particularly useful if you’re working to build your quads or improve athletic performance.
Benefits of the Jefferson deadlift
Builds quads without a squat rack
The main benefit of the Jefferson deadlift is that it’s an excellent option for building anterior-chain leg (read: quad) strength without a squat rack.
You’ll immediately notice upon your first few reps of this exercise that your quadriceps are being hammered much harder than they would in a normal deadlift. Though quadriceps range of motion and contraction isn’t as high as it would be in a typical squat, it is much higher than it would otherwise be from just doing deadlift variations (even sumo deadlifts).
The advantage there is that this exercise can be very useful for those who either need (or want) to work out in a “minimalist” style – doing barbell movements from the floor in a garage or back yard.
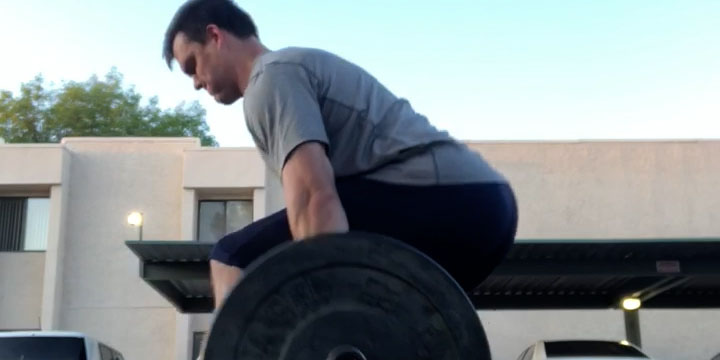
[Image of the author doing Jefferson deadlifts in a parking lot]
It’s an excellent anti rotational exercise
The Jefferson deadlift, by its very nature, requires a fair bit of anti rotational strength. This is where it gets is great carryover to athletics.
While most sports have some sort of core rotational demand for throwing, catching, swinging, punching, etc, most gym exercises lack this component.
Adding Jefferson deadlifts into your weekly routine is a great way to plug this gap in traditional training, if you’re involved in a sport that requires rotational or anti-rotational strength.
Fits well into barbell circuits from the floor
One of the things I’ve experimented with quite a lot over the years is barbell circuit training using nothing but a heavy barbell and weights, generally with great hypertrophic results.
However, one of the main challenges of this style of training is that it’s tough to load the quads effectively without a squat rack.
While many lifters’ first instinct is to attempt front squats from the floor by power cleaning the weight into position, most of us don’t power clean a weight sufficient enough to truly overload the quads.
Exercises like the Jefferson deadlift are a great cheat-code for this style of training, allowing us to overload the quadriceps without having to engage in heavy power cleans just to get a heavy weight into position.
Common mistakes to avoid
As with other semi-forgotten old-school lifts (behind the back deadlifts, anyone?), the number one mistake of beginning to use this exercise is simply jumping into the deep end to quickly with heavy weights. Let me explain:
If you’re capable of deadlifting or squatting heavy weight, you may be itching to load this movement up heavy. Though there’s nothing inherently wrong with doing this (in fact, that’s kind of the point of the exercise), I would advise using smaller jumps in weight in the beginning.
As mentioned above, it’s common for individuals new to this lift to hit their legs or nether-regions with the bar on the way up. If you’re used to normal squats, where this isn’t a problem, you may be in for a rude awakening.
Just like when you first started lifting, you may need a few sessions to become acquainted with this exercise.
Rest assured that once you do, you should be able to load Jefferson deadlifts heavy without issue. At this point you can fit them into any normal training program as you see fit.
How to pair the Jefferson deadlift with other exercises
As mentioned above, I believe that pairing the Jefferson deadlift with other exercises from the floor is perhaps this exercise’s greatest feature.
Here’s an example workout that tends to work well for hypertrophy and requires only a barbell and weights:
- Floor Press – 8-10 reps with 1-2 reps in reserve
- Rest 30-60 sec
- Barbell Row – 8-10 reps with 1-2 reps in reserve (often the same weight used in the floor press)
- Rest 30-60 sec (add weight to get ready for the Jefferson lift)
- Jefferson Deadlift – 1-2 RIR
- Rest 30-60 sec (remove weight to get ready for the next set of floor presses
- Repeat 4-6 times as required (make sure to switch legs for each set of Jefferson lifts)
Add a couple sets of barbell curls and upright rows at the end of the session if hypertrophy is your goal.
If you’re truly getting close to failure on each set by leaving only one or two reps left in reserve, repeat this workout 2-3 times per week and eat in a surplus. After a couple of months of this, you will definitely be bigger.
Unlock the power of this unconventional lift
In conclusion, the Jefferson deadlift is a highly effective exercise that targets multiple muscle groups, making it an excellent addition to your workout routine. It helps to build strength and power in the posterior chain muscles, such as the glutes, hamstrings, and lower back, and but it also hammers the quads, making it a very versatile lift.
By incorporating the Jefferson deadlift into your workout routine, you can expect to see improvements in overall strength, power, and muscle mass.
Remember to listen to your body, recover properly from session to session, and let the gains roll in!
