If you want big, round shoulders from just bodyweight exercises, just do pike push-ups, right? Not so fast. In this article, we’ll explain why “just do pike push-ups” is horrible advice, and I’ll provide you with a tried-and-true program for building shoulder strength and mass with calisthenics.
Without further ado:
This calisthenic shoulder workout is intended to be done twice per week for optimal results. The exercises, in this order, are:
- Modified inverted row (with a shoulder bias)
- Bodyweight lateral raise
- Pike Press
Many who see this plan immediately ask why we aren’t starting with the obvious “shoulder” exercise, the pike press (or handstand push-up, if you’re so inclined).
The reason is simple: if we’re going for aesthetics or mass, why would we start with the most overdeveloped muscle of the shoulder.
If you’re doing push-ups, weighted dips, bench press, or any other compound pressing movement, you’re hammering your anterior deltoids regularly. Which means that if your shoulders aren’t round, your front delts aren’t the problem.
I actually include the pike push-up here because I still think it’s a useful exercise, but in all honesty, you could drop it from this program entirely and it likely wouldn’t make a huge difference.
What will make a difference? I’m glad you asked:
The reason your shoulders suck
The reason your shoulders suck is … you’ve got no rear delts!
It’s true: big rear delts make a person look athletic. They are visible from the side, from the front, and every angle.
Smart bodybuilders figured this out decades ago. It’s why you see Jay Cutler, John Meadows, and many others starting their shoulder days with a rear delt exercise, moving to side delts, and then finishing with front delts.
Let’s think about this logically. Say you’re on a basic strength program where you’re alternating overhead pressing and horizontal pressing for three sets each three times per week. Fine. Perhaps you’re also doing three sets of pull-ups on your horizontal pressing days. Also fine.
Here’s a breakdown of the stresses placed on your shoulder muscles on a plan like this:
- Front delts: 9 hard sets per week (all pressing)
- Side delts: 4.5 suboptimal sets per week (since overhead pressing doesn’t hit the side delts very well)
- Rear delts: 4.5 sets per week, AS AN AFTERTHOUGHT (pull-ups)
See the problem? The solution to your crappy shoulder development is NOT to double-down on front delt work by adding a bunch more overhead pressing. Lagging body parts are the culprit here. You never really hit your rear and side delts very hard, and wonder why your shoulders aren’t round!
How to actually build shoulder muscle
For this plan, we’re going to use only bodyweight exercises, a minimum of equipment, and no party tricks. Just good old-fashioned logic and gravity:
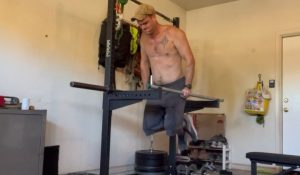
Exercise #1: Inverted rows with a shoulder bias
I’ll be honest, no other exercise, calisthenic or weighted, has noticeably made my shoulders look bigger than this specific variation of the inverted row. I’ve written elsewhere on the site about how I don’t think the inverted row is particularly useful for what most people use it for: as the “kindergarten” version of a pull-up.
I’ve also said that I think the inverted row is a fantastic exercise for certain applications. Which applications? Building mass in the rear delts is a big one. This exercise, modified as shown below, will hammer the shoulder, and because the exercise isn’t extremely difficult, it’s easy to get a massive number of full range-of-motion repetitions done quickly.
How to do it:
- Set up a bar or rings at around hip height. In this picture I’m using a barbell and a “medium” grip (pinkies on rings). You can play with grip width as you go, to determine which grip width puts the most stress on your rear and side deltoids. Hands shoulder width or just outside seems to work best for me.
- Bend the knees and arch the back as if you’re trying to reach your head towards the ground. This should feel similar to a powerlifting-style bench press position, without the bench.
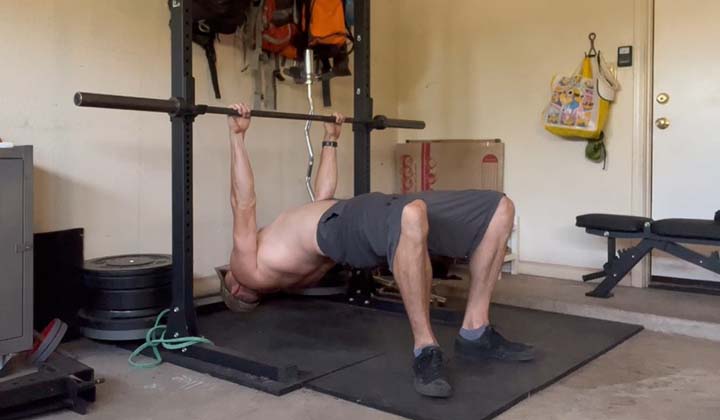
- Pull the bar towards your sternum, gently touching the bar to the sternum, pausing briefly at the top, pinching the shoulder blades together.
- Lower towards the start position over the course of a 2-3 second count.
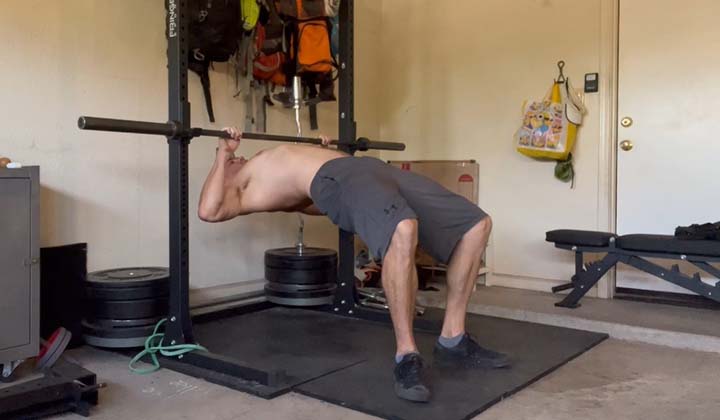
If there’s one exercise to do for shoulder mass with calisthenics, it’s this one. It will smash your medial and posterior deltoid muscles. Don’t listen to the handstand push-up bros: you’re going to hammer your front delts anyway.
Exercise #2: Bodyweight side-lying “lateral” raises
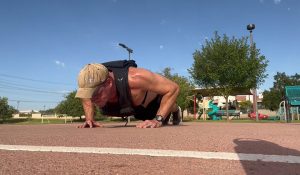
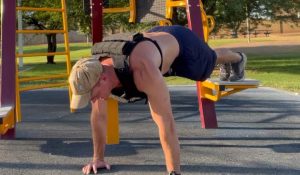
If you’ve ever done dumbbell “side-lying” lateral raises on a bench, Arnold-style, you’ll immediately understand what we’re going for here. This is the bodyweight version of that exercise, and it is brutal on the side and rear delts.
The positioning of your body may require a bit of experimentation, but once you find the angle that allows for the most leverage, you’ll feel it immediately.
Keep in mind that this exercise is tough. Don’t expect to be doing high reps. I also recommend placing a towel or something soft under your elbow to keep from grinding your elbow into the ground as you do your repetitions.
How to do it:
- Lay on your side, with the back of your upper arm outstretched around a 90 degree angle from your body.
- Bias your weight forward over your arm and raise your knees off the ground. This will place a high percentage of your remaining bodyweight directly over the shoulder joint.
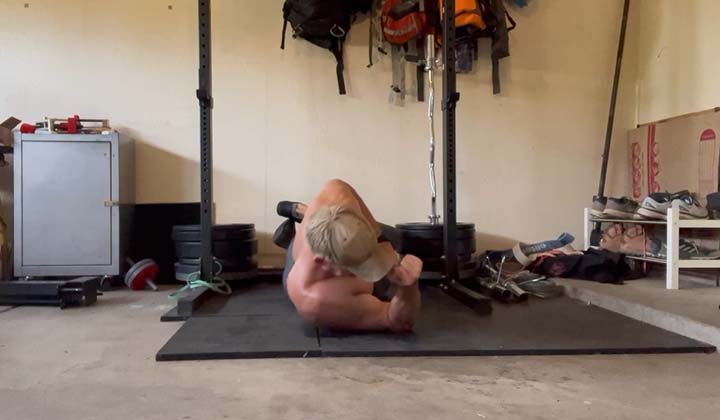
- “Lever” your body upward by pressing into the ground with your elbow. Once you’ve reached full extension, reverse the steps to return back to the start position
- If you do this properly, you’ll feel it halfway between the side (medial) delt and the rear delt.

If the exercise is too tough for you, I’ve had good luck doing negatives, similar to how we’d use negative pull-ups to build up to normal pull-ups.
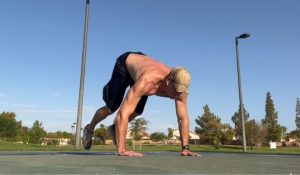
Exercise #3: Pike press (or handstand push-ups, if you’re a maniac)
At this point in the workout, your shoulders shouldn’t be feeling fresh. If you’re still up to doing handstand push-ups, then be my guest. For us mere mortals, I find that the basic pike push-up fits nicely in this slot as a finishing move.
Afterall, it does technically hit the side delts when done properly.
How to do it:
- Set up in a pike position (or handstand position) as shown below. You’re welcome to place your feet on a curb, box, or bench if you want to make the exercise harder. You’re also welcome to use push-up handles or bumper plates to elevate the hands and increase the range-of-motion. Dealer’s choice.
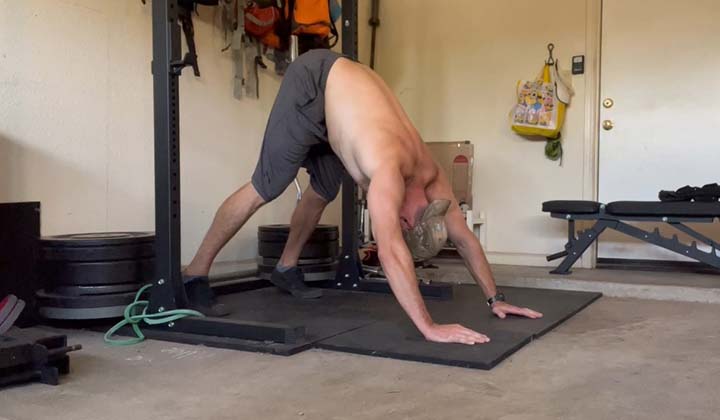
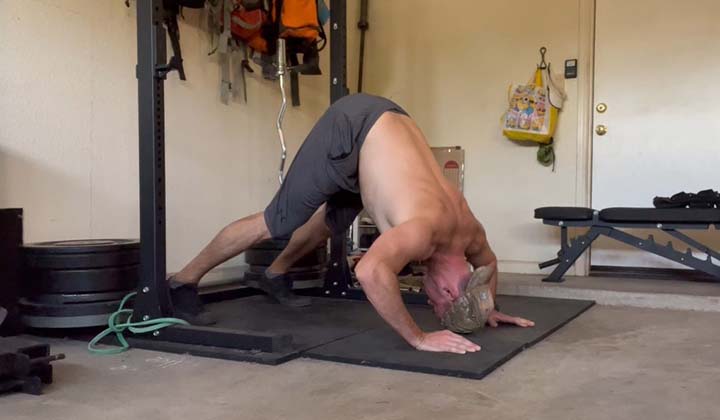
- Allow your body to lower until the crown of your head touches the ground gently.
- Press at an angle up and overhead. Do not press straight into the ground, as this will turn this push-up into a glorified high-incline press. You should feel it in the side delts if you’ve done it properly.
- Squeeze the traps at the top, attempting to press your delts into your ears (similar position to the bottom of a full range-of-motion pull-up).
Putting it all together: bodyweight shoulder workout weekly plan
As I mentioned at the beginning of the article, I recommend doing these three exercises in the order they are listed, twice per week for optimal results:
Workout A: Rest-pause
Do three sets of each exercise, with 30-ish seconds of rest between sets:
- First set should leave 2-3 repetitions in the tank
- Seconds set should leave 1-2 repetitions in the tank
- Third set should leave 0-1 repetitions in the tank (almost failure)
The three sets should feel like an extended, “Dogg Crapp” style rest-pause set.
Workout B: Myo reps
This workout should be done two to three days after the first one, once you’re mostly recovered. The protocol is easy: perform myo reps for each exercise. Rest 1-2 minutes between exercises.
Option 2: Bro-split style
If you’re doing this bodyweight shoulder workout once per week (bodyweight bro-split style), then stick with the rest-pause version (Workout A), but hit six sets per side, leaving 2-3 repetitions in the tank per set.
Personally, I do not recommend hitting a body part only once per week, especially if you’re trying to bring up that body part. However, there are certain situations where it makes sense to do so.
Enjoy those shoulder pumps
I toiled for a long time with building shoulder muscle. Once I started doing this program, everything changed. As I stated throughout the article, I firmly believe that the modified inverted row is the real difference-maker here. If you’ve got to sacrifice all else, keep this movement.
Once you’ve brought your shoulders up to the level you wish after 3-6 months, go ahead and place them on the back burner. A single myo-rep set or rest-pause set of modified inverted rows twice per week should keep your shoulders where you want them, provided you’re continuing to do other calisthenic exercises, like dips and pull-ups.
Good luck!!


